
Shipping: Across India, MOQ applicable.
Pricing: 3D Embossed, Raised Effect Stickers starting from ₹150 per square foot
A bland, rectangular piece of paper, printed in flat two dimensions, is what comes to mind when you hear the word ‘sticker’ or ‘label’. And this 2D, rectangular form factor works well for most typical labelling applications.
For example, an ordinary paper sticker will work great for labelling the ingredients on a food packet.
But what if the intended placement call for the sticker to be of more premium quality? An ordinary paper sticker, displaying the manufacturer’s logo on a white goods device, like a food processor, is just not going to cut it.
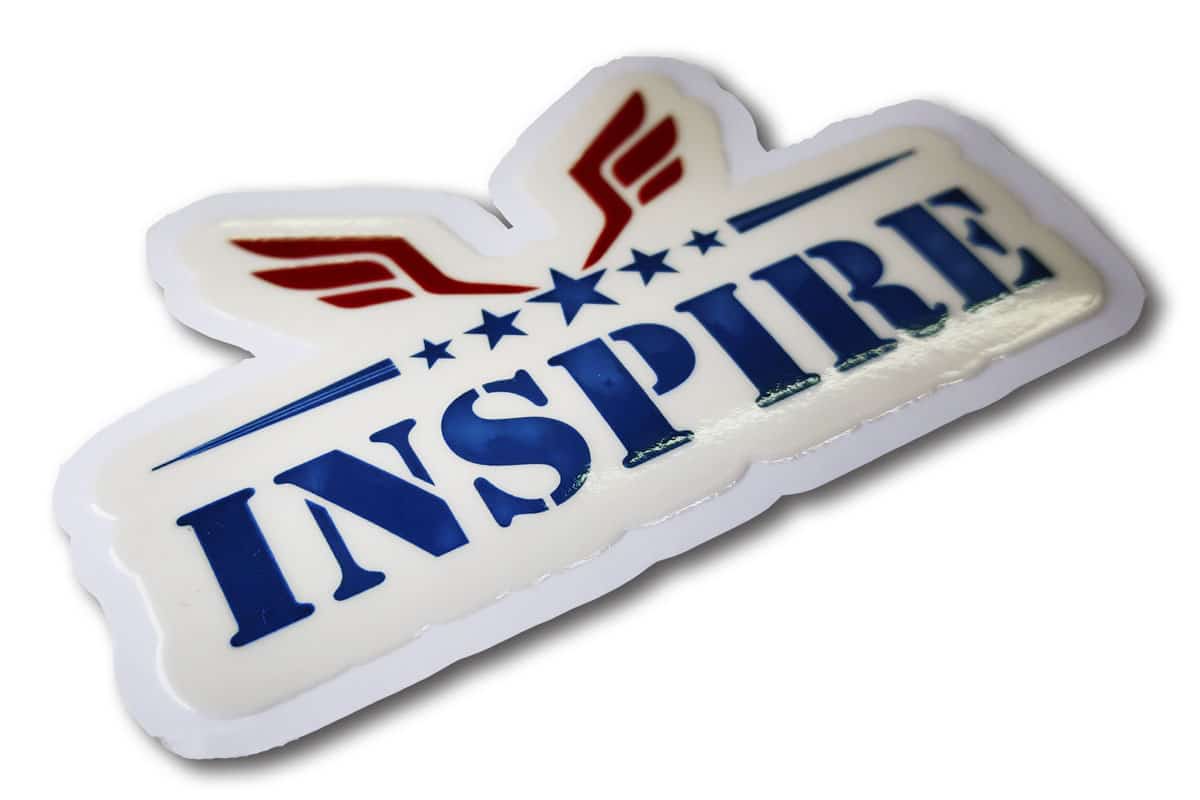
And so, for product branding applications requiring more premium quality decals, our 3D embossed stickers are a great solution. These prints are commonly referred to as raised effect stickers and decals.
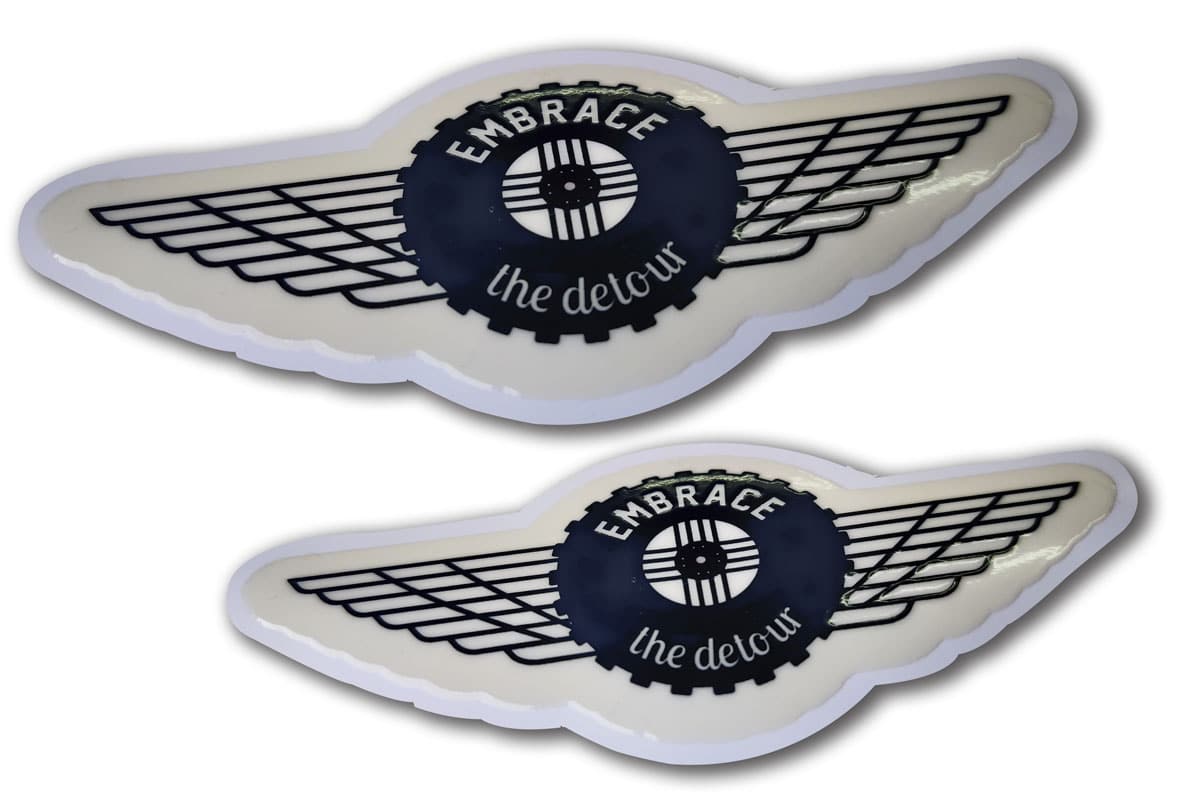
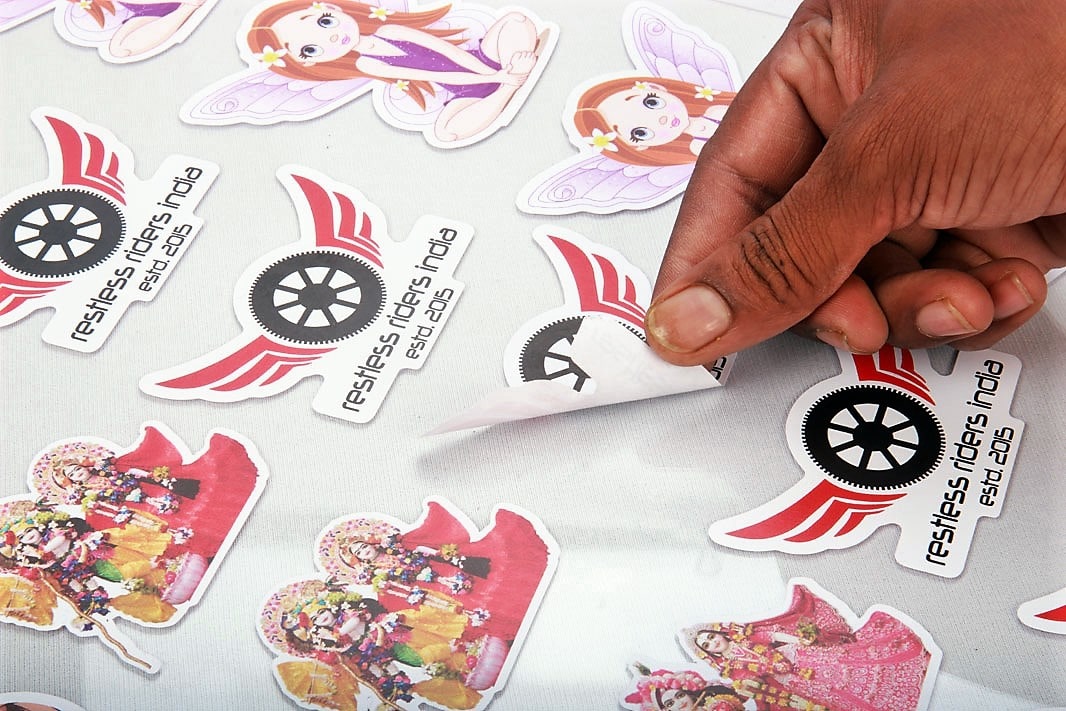
Embossed Effect Stickers available at Orchid Digitals
And so, for product branding applications requiring more premium quality decals, our 3D embossed stickers are a great solution. These prints are commonly referred to as raised effect stickers and decals.
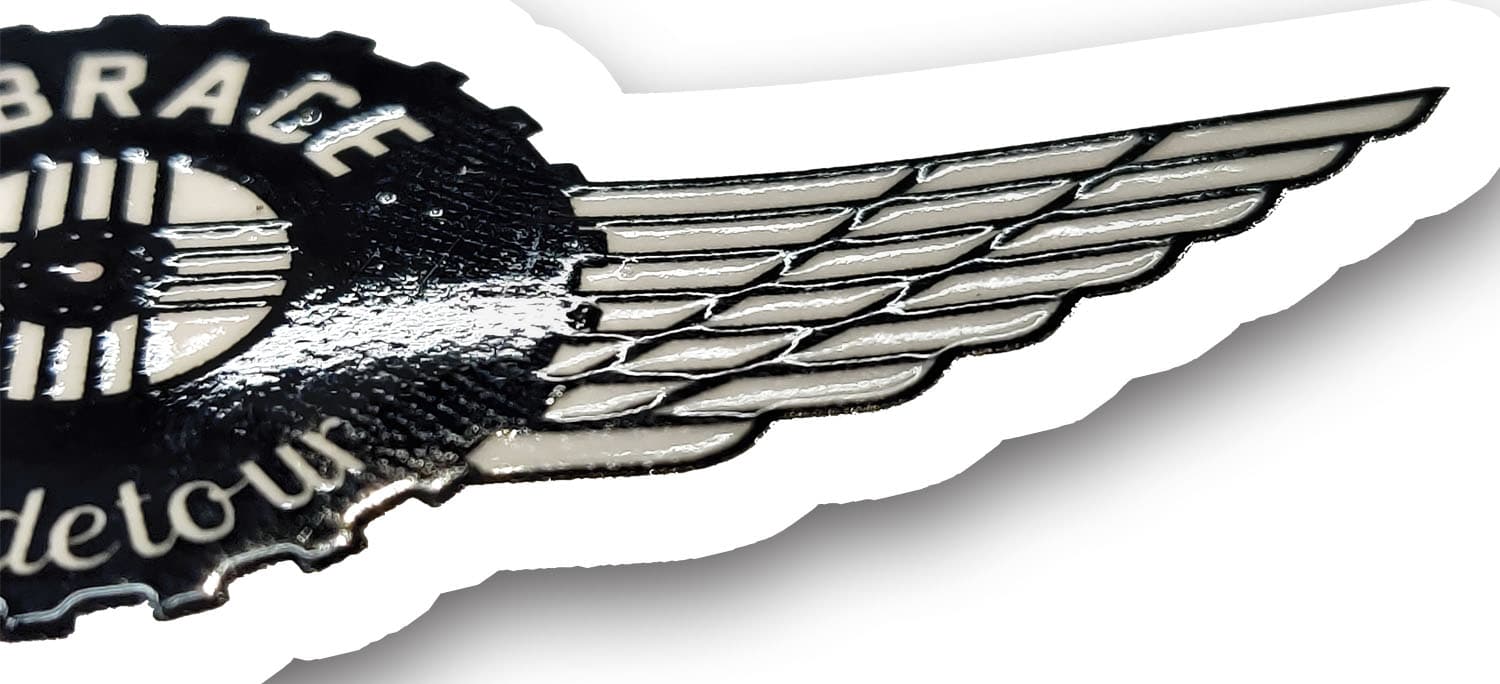
The 3D portion of the stickers has a depth and an embossed effect. You can visually make out the areas that jut out from the surface of the print media.
Moreover, these stickers also have a very rich and tactile feel. When you run your fingers over the print, you can feel the depth of each of the individual portions of the image raised from the surface.
You can give a raised, 3D effect to selected portions of the print.
For example, if we have an image of a model holding a product, only the product and the company name can be selectively raised to give an embossed effect. This will draw particular attention to the essential parts of the communication that need to be highlighted.
The embossed area has a glossy and shiny look due to the clear ink coating given to it. This top-coat catches the light beautifully to make our sticker look extremely attractive.
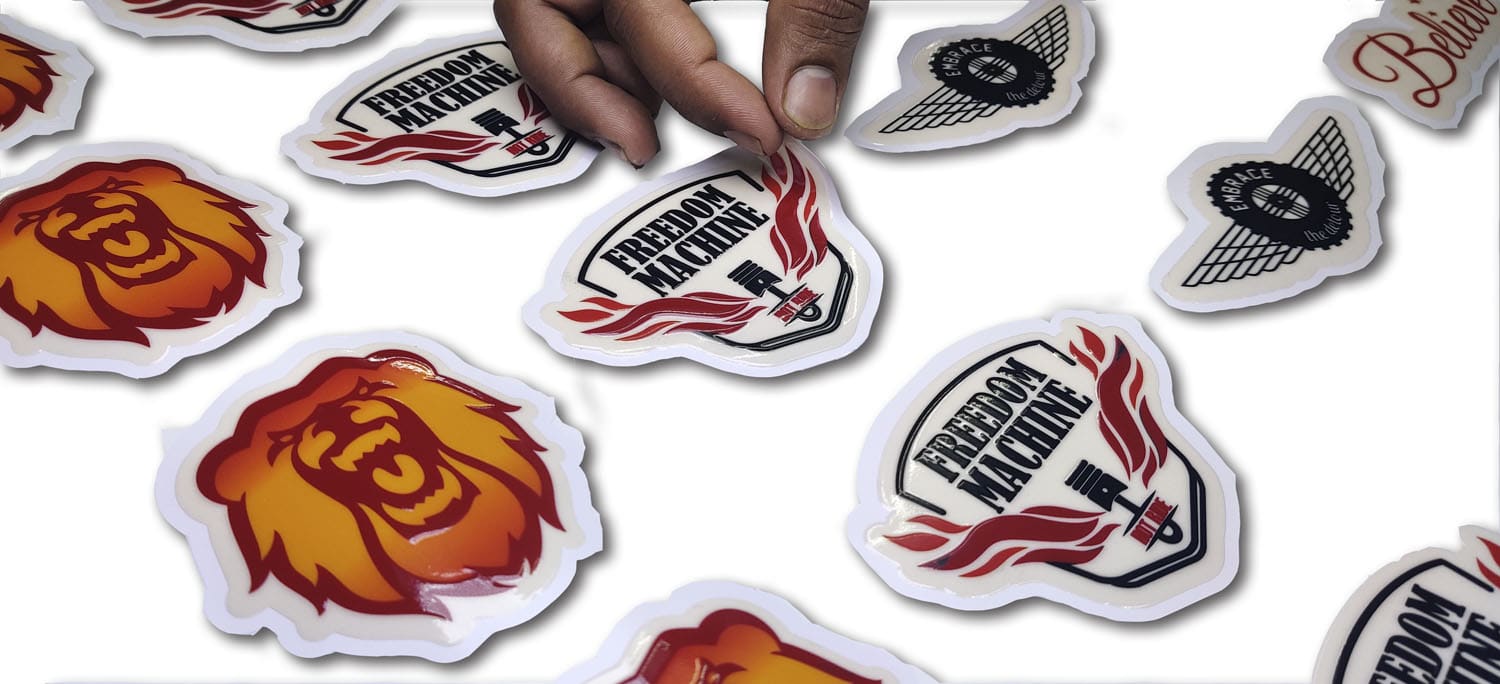
Besides having a depth effect, you can also cut our 3D stickers into any non-linear shape you desire.
Most labels are boring squares or rectangles. But our machines are equipped with inline cutters. And they can be programmed to cut the labels in the shape of the design being printed.
For example, if you are printing a shield, the blades will cut the edges of the sticker in the shape of a shield as well. This process, known as kiss-cutting, significantly enhances the form factor of the finished job.
Please click here to know more about kiss-cut stickers at Orchid Digitals.
Car bumper stickers and small-sized decals that go on the fuel tanks of bikes to show exclusive messages and designs. These stickers need to be waterproof. Moreover, the inks should not fade in the sun. Our UV printed stickers are ideal for this. And the 3D decals give a premium look and feel to the same.
White goods like a refrigerator, mixer grinder, microwave oven, etc., need to display the manufacturers’ logo on the front in a very classy way. Embossed stickers are ideal for this.
Exhibitions and tradeshows very often distribute stickers with funny messages as memorabilia. Using a mere ordinary sticker will not impress the visitors; a high-end 3D solution is the need of the hour.
Companies need labels to brand high-end assets like laptops and mobiles that they hand over to their employees. Again, an embossed label wins against an ordinary paper sticker, in this case.
Resellers often import devices from abroad. For example, a trader who brings in vast quantities of power banks to sell locally. These resellers then have to rebrand the products in their name.
What is needed is a high-end logo sticker that will display the importer’s brand. This sticker also has to mask the original manufacturer’s mark. A professional quality embossed sticker, in this case, is the only option to go for.
We use ultraviolet inks to print embossed stickers. These UV inks make our product ideally suited for both indoor as well as outdoor applications because of the following reasons:
This section is relevant for those who seek in-depth knowledge about the techniques used for raised effect printing. You can read on to find out more about the same or jump straight to the pricing section.
A layer of ink on plastic or paper media forms the image that makes any sticker. But the problem with this layer of ink is that it is two-dimensional and has absolutely no thickness.
To create a sticker with a raised effect, we need the letters/image to jut out from the base print media.
Let’s assume that we need to make a 3D sticker bearing the following message:
MADE IN INDIA
One can achieve this effect by using either one of the two techniques described below:
The traditional method to create a raised effect print involved a lot of steps and processes. These include:
Step 1: Print the above ‘MAKE IN INDIA’ letters in 2D on a sheet of paper.
Step 2: Manufacture a ‘die’ or stamp made of lead. The same design, font, and size used in the original print is to be replicated while engraving the die. The letters ‘Made in India’ will be raised from the metal plate, very much like the rubber stamps we see in offices.
Step 3: Place the ‘MADE IN INDIA’ shaped die exactly beneath the printed ‘MADE IN INDIA.’ Finally, press the metal stamp hard against the printed paper using a specialised punching machine. The pressure of the punch distorts the sheet of paper into the required shape and gives the letters a raised, embossed effect
As you probably figured out, the traditional die punching method has a couple of problems.
Die punches are expensive to manufacture. Also, they are time-consuming to deploy. Hence die punching makes sense only when we have to process vast quantities of the same sticker design.
At Orchid Digitals, we have a solution to overcome these limitations of ordering needlessly large quantities of stickers, incurring huge costs, and waiting for a long time for your job to be delivered.
Our UV printers can generate small batches of highly professional looking 3D embossed stickers. Moreover, you can have multiple/different designs of stickers in the same batch. And the turnaround time for the job is measured in hours instead of weeks. Finally, you can also generate the stickers in any non-linear shape that you desire.
To understand how we manage to achieve all of this, we first need some knowledge about Ultra Violet Inks and UV Printing.
UV inks are unlike traditional liquid inkjet inks. Most inks get absorbed by the media they fall on. The liquid water dries off, and the coloured dyes remain on the paper to form our letters and images.
But UV printing machines inks have three characteristics that a knowledgeable printer can exploit to create prints with a raised effect.
UV inks do not get absorbed by the paper/plastic media they are printed on. The inks are left sitting on top of the print surface, drying up to form a solid layer.
When you run your fingers over a UV print, you will feel a separate layer of ink very slightly jutting out and raised from the surface of the base media.
All industrial printing machines have four inks – CMYK (Cyan, Magenta, Yellow and Black). When used in different proportions, these inks can generate all the colours in the spectrum to reproduce any and every image.
But print houses can configure their UV printing machines with additional colours like white and clear/transparent inks, over and above the standard CMYK set of colours.
In this case, the ‘clear inks’ are deployed to overprint a transparent plastic coating on top of selected areas of the image. This effect is also known as spot lamination, where only certain areas of the printed image have an additional coat of transparent ink on top.
Finally, all wide-format inkjets have a built-in ‘multi-pass’ or over-print setting. By enabling this feature, the printer keeps printing the same layer of ink repeatedly, at the exact location.
As more and more layers of ink are deposited over the print media, the height of the image keeps increasing to give it a raised, embossed effect.
So to create a 3D embossed effect print, here is what we do at Orchid Digitals:
Step 1: In our ‘MADE IN INDIA’ example shown above, we first print a layer of coloured ink to reproduce the letters in question.
Step 2: We then print a layer of transparent/clear ink on the coloured ink layer. The clear coat covers the defined image area only. This means that the transparent ink is layered only over the pre-printed ‘MADE IN INDIA’ letters and not anywhere else
Step 3: Finally, we use the multipass feature on our printer to repeatedly print many additional layers of clear/transparent inks on top of the original layer.
Remember how I earlier mentioned that UV inks do not get absorbed by the media. Instead, they are left sitting on top of the same.
So, with each successive layer, the letter becomes thicker and thicker. Depending on the job requirement, we overprint the image 16, 32 or even 64 times.
As you can guess, with 64 layers of clear ink, each on top of the other, the letters get a lot of depth, and our 3D, embossed effect print is ready.
Embossed stickers are available on different media to achieve different kinds of results and end applications. The media options are:
White, opaque stickers are the most basic option available at our place. This vanilla choice works well in most scenarios and use-cases.
We use high-grade vinyl of the 3M or Avery brand to manufacture our stickers.
This practice ensures very high quality for the end product, and you can rest assured that your sticker will remain in place and last for years to come.

As the name suggests, these stickers are printed on a transparent film. Our clients use such transparent stickers for pasting on glass surfaces.
And there is an additional benefit of transparent stickers. The print matter in this option is immediately noticeable, and the surface of the product beneath shows through the non-image area.
This option works well when you want your stickers to shine brightly in low-light conditions. The material used here is a light-reflecting radium film. This film is widely used in signboards on highways, making them light up at night when our car lights fall on them.
These stickers are ideal for use as decals for vehicles, helmets, mobile phones, etc.
While embossed stickers are themselves great options for branding, here are some variants that you might want to check out:
3D stickers are both embossed and shape-cut. Remove the 3D layering, and you still get great looking kiss-cut stickers. This option works great for logo decals, merchandise, and product branding.
A dome label is another 3D sticker option that looks highly impressive.
Dome stickers have a transparent and tapering top surface made of epoxy resin. The clear glass-like and dome-shaped top layer, on top of the print reflects light beautifully off the sticker.
Dome stickers are an ideal solution to grab customer attention, and make your product look a class apart.
You can use any type of .jpg or image file for making embossed stickers. But two elements of the file need to be defined as vectors.
You can do this in design software like Corel Draw. Click here to learn how to define edges/contours in Corel Draw.
It also makes sense to have a slight white edge or space between the image and the outline that the machine will cut. This space highlights the matter within and also serves to increase the life of the sticker significantly.

This is the actual image that has to be printed. It can be in any format, either vector or raster. Place this image in a layer or even on a separate page in your design file.

Select the portion of the image that has to be embossed. Create a mask of that shape and place it in a separate layer/page in your design file.
This mask has to be in a vector format.

Define the outline/edge of the sticker. This is where the machine will run its blade over, to kiss-cut the sticker in whatever shape you desire.
This outline has to be in a vector format.
Superimpose all the elements to check if they align with each other.
Correct registration of all the layers will result in a more finished job with better quality.
Once the file is ready, here is what happens at the print station:
No. We do not have an in-house designer. And we do not provide designing services to our customers.
The artwork for the job generally comes in from the client’s end. We simply take the ready file and process the same on our machines.
In case you need designing support, do jump to this page which lists, DTP operators, graphic designers, advertisers, brand managers and other resources.
We print the job on large rolls of a material called vinyl. Producing smaller quantities is hence, difficult. And we have an MOQ in place for this product.
The MOQ or Minimum Order Quantity of this product is 20 square feet. So we’ll fit multiple labels on a sheet of size 4 feet wide X 5 feet high. The minimum billing amount for this job will work out to Rs.3000.00 + taxes
To give you a meaningful estimate, we need answers to the following two parameters:
1. The size/dimensions of the sticker
2. The number/quantities of labels needed
Do fill in the above details in the feedback form below. It will help us work out an estimate for you. And if you have your artwork/designs ready, please attach the same to the ‘Contact Us’ form as well.
No. We don’t supply stickers in a roll form. You will receive multiple stickers laid out in a sheet.
Any high resolution file format will work for us. You can send in .jpgs, .tiffs, .cdr, .eps, .pdf, or a .png. But be sure to define the cutting outline in a vector format.
Yes, this is possible. Do share your artwork as a hi-resolution transparent .png. We’ll set the outlines at our end.
Putting in a 3 or 4 mm white contour /border will help in two things.
It will significantly increase the life of the sticker and prevent inadvertent peeling. A white contour around the edges looks good! And makes our image stand out.
Yes. Online payments are accepted at Orchid Digitals. In fact we try to finish the entire job online. All you need to do is mail us your artwork/design file along with the requisite dimensions, material specifications, copies needed, etc.
After evaluating/understanding your project requirement we send across an estimate for the same. This estimate (in the form of a Proforma Invoice) will also contain an online paylink encoded in a QR code.
Scan the QR code to make the payments.
Once the funds are transferred, we process the job and the ship the same across to you.
These prints can be shipped/delivered anywhere in India.
Their material specifications for the stand are as follows…
Vinyl stickers are charged per square foot. So you need to reverse calculate the cost per piece, based on the number of stickers fitting in one square foot.
For example, the per square foot price of embossed stickers on white vinyl is Rs.150.00
Let us assume that you have a 2 inch X 2-inch sticker. Thirty-six stickers of this dimension will fit in a square foot. So the cost per piece is 450 / 36. Which works out to rupees 4.20 per piece plus taxes
Embossed stickers are available in 3 different media options:
Display stand cut in the shape of your artwork
Please Note:
Please leave us your details and we will respond promptly
